
If you are building WordPress sites for clients, then here’s the perfect solution to quickly brand the dashboard with your own logo, and remove the default WordPress widgets that confuse your clients.
Now, everytime your customer loads their WordPress admin area, they will be reminded of you and feel an overwhelming urge to call you up and give you more money to implement new features on their site.
I hope you enjoy this plugin… It is quite simple, but quite handy if you are tired of training your clients on how to navigate the WordPress admin.
If you are indeed a local website marketer, then please feel free to hit me up through email. I work with a number of local website marketers as I offer a white label service where you can make more money selling advanced marketing strategies and not have to worry about the tech.
Download WordPress Plugin – Simple Dashboard
Here’s a walkthrough of each step:
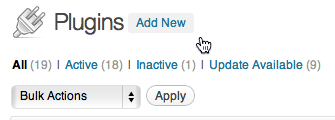
Click “Add New” on the Plugins Page
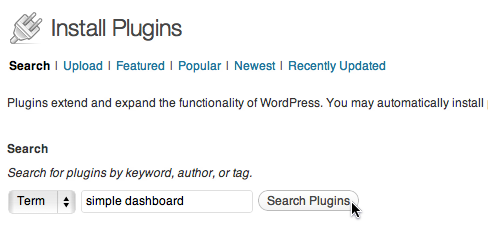
Type “Simple Dashboard” into the text box and click Search
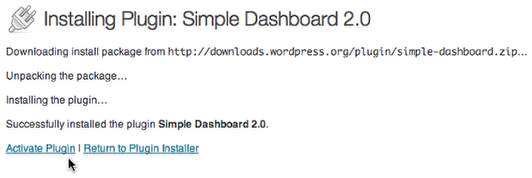
Click “Install Now” under Simple Dashboard

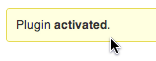
Click “Activate Plugin”
You should see this message on the next screen…
Navigate back to the WordPress Dashboard

You should now see a new simplified layout…

Click “Configure” to brand the Dashboard image with your logo

Enter your own website/logo details and click the Submit button

Click “Configure” on the Posts Widget

Customize the widget to your liking and then click Submit

Repeat this step for the Pages widget. You can choose how many items you would like to display as well as whether to show the post author and date.
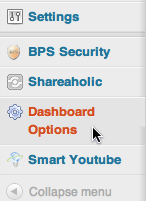
Select “Dashboard Options” in the left hand side menu
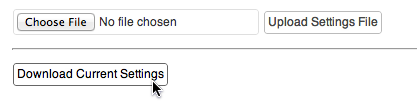
Download your current settings to roll out to your other WordPress sites
Done!
Save that file in the last step to your computer and upload to as many WordPress installations as you like to brand them with your logo and widget settings.